Unvented / Conditioned in Attics
Why Flat & Low Angle Roofs Fail
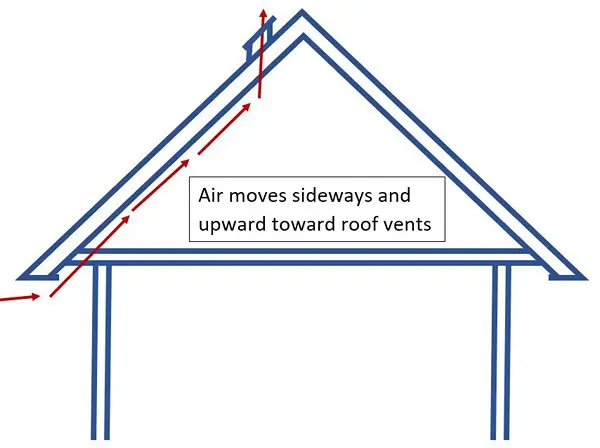
First, it’s critical to understand how attic ventilation works. Sure, you can build a roof with perfect soffit and upper roof vents – but what causes the air to move? Wind is helpful, but far too infrequent to act as a reliable source of air movement. The majority of air movement in an attic occurs due to the stack effect. The stack effect describes the movement of warm air upward in a building. The same principle occurs in an attic. The air in the attic is warmed by the heat moving upward from the occupied part of the home. This heated air wants to rise vertically. In a house with a regular or steep pitched roof, the air hits the underside of the roof sheathing and redirects at an upward angle. While the air would prefer to continue vertically, the roof angle is steep enough to allow for continued moving up and out the upper roof vents.
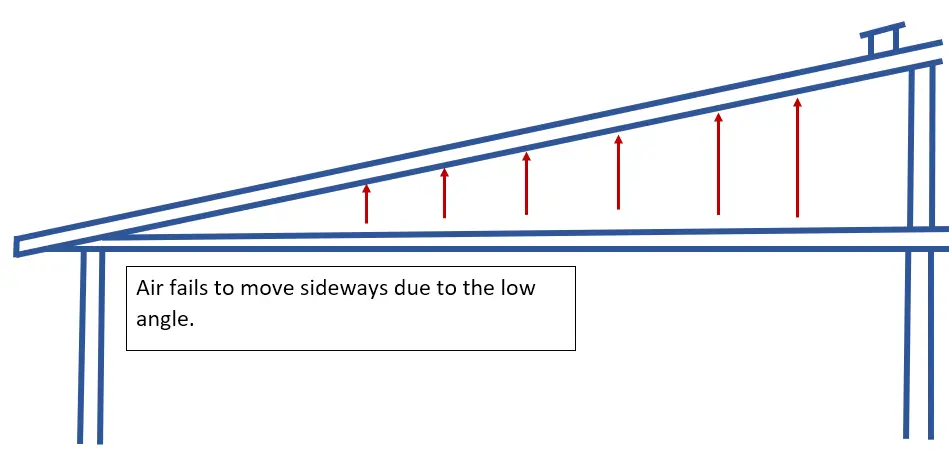
What happens when you build a low angle roof? The air still wants to move vertically upward, but now the angle of the roof is very low. To move upward, it first must traverse sideways for many feet. In many cases, the air simply doesn’t move. The warm (and moist) air stagnates and eventually condenses on the underside of the roof sheathing.
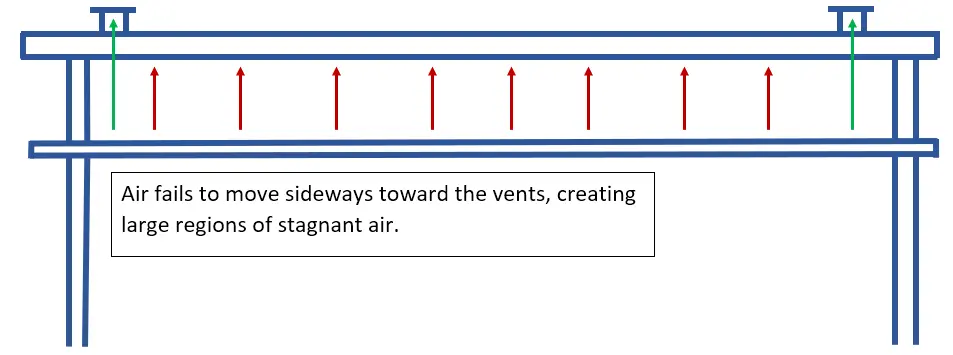
The problems become even worse with a flat roof. Without an angled roof, the moisture-laden air has no motivation to move toward the vents. Over time the moisture collects on the underside of the roof decking. In commercial buildings, the issue is dealt with by installing the insulation directly on the underside of the roof sheathing. In residential homes, it’s far more common to install insulation on the ceiling, toss some vents along the perimeter and hope for the best.
The Code Has Addressed This, Right?
The code now allows for conditioned attics. But it also still allows for the questionable practices described above. Most of the failed roofs we see passed building inspections with flying colors. Therefore, it’s the responsibility of the builder, architect, insulator, and roofer to understand the right way to build flat and low angle roof assemblies.
Unfortunately, most roofers and architects are not learning from their mistakes. The roof below was heavily damaged by condensation. Yet the original roofer was rehired to redo the roof using the exact same techniques.

Flat roof severely damaged by condensation.
Adding extra vents won’t help. If the air won’t move laterally with 10 vents, it won’t move anymore with 20. Even homes with vents in every bay can suffer from extreme condensation and mold/rot. The photo below is from a flat roof condo unit. Despite the plastic baffles to ensure a proper air channel, mold growth has attacked the underside of the roof sheathing. No slope = no air flow. Converting this to a conditioned attic would permanently eliminate the condensation and mold issues.
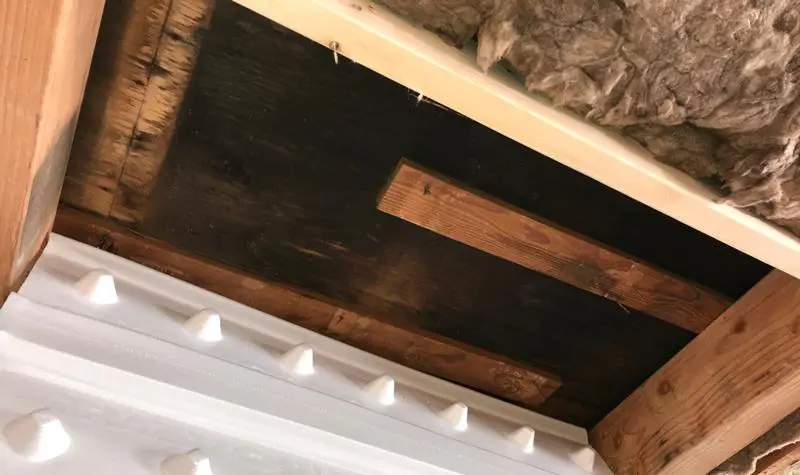
Flat, vented roof suffering from mold growth.
Vaulted Ceilings and Steep Pitch—Same Problems
Cathedral/vaulted ceilings often suffer from heavy condensation and mold growth. In these scenarios, it’s not from the lack of pitch, but rather a missing air channel. To vent properly a 1.5 – 2″ air channel is required directly beneath the roof sheathing. This is tricky to pull off in the real world. It’s quite common to see horizontal framing blocking the air flow halfway up the roof. Insulation, compressed during installation, often expands in the subsequent weeks, slowly blocking off the air flow. Unless the roof assembly is constructed with a high attention to detail, failure is probable.
The Solution is a Conditioned Attic
Flat and low angle roofs can operate successfully. However, this requires installing the insulation directly on the roof sheathing. This prevents condensation and eliminates the need for ventilation. This is referred to as a “conditioned attic”. In building science, the part of the home warmed or cooled by the HVAC system is considered conditioned. Thus when the insulation is applied to the roof sheathing (instead of the ceiling) the entire attic space becomes part of the conditioned home. The heating and cooling system now affects the attic space.
Option 1 – Rigid Insulation Above Roof Sheathing
This technique is preferred when there is no access to the attic (vaulted ceiling or tight attic). It’s best done when a reroof is already necessary. Typically, 4-6” of foam is installed. An additional layer of plywood is installed on top of the foam. The actual roofing material is then installed on top of the plywood. This approach works well for inaccessible attics. If accessible, fiberglass batts can be installed beneath the lower plywood sheathing. This is less expensive than trying to reach the required R-value solely with the foam. Note – we highly recommend a self-adhered waterproof membrane such as Ice & Water Shield beneath the final roof material.
It’s important to note that certain features will increase in size (i.e. fascia boards) due to the extra height of the rigid insulation. An excellent description can be found here. Diagrams courtesy of the Department of Energy.
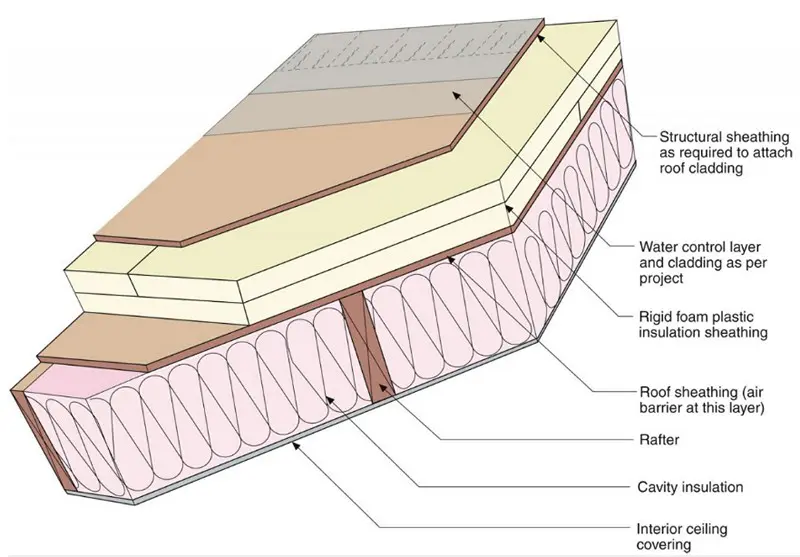
Conditioned attic with rigid foam above roof sheathing.
Option 2 – Spray Foam on Underside of Roof Sheathing
This technique utilizes spray foam (closed cell) applied to the underside of the existing roof sheathing. It’s the preferred option when the existing roof is in good condition and the attic is accessible. In Western Washington, code requires 2″ of closed cell foam. Next, fiberglass insulation batts are installed directly beneath the spray foam. Utilizing fiberglass insulation for the remainder of the required R-value greatly reduces the overall cost of the project. Below is a diagram of a conditioned attic assembly in vaulted / cathedral ceiling configuration. This diagram illustrates a vaulted ceiling assembly. In a traditional/accessible attic, the interior ceiling covering would not be directly against the fiberglass batts. More information can be found here. As in the scenario above, we highly recommend a self-adhered waterproof membrane.
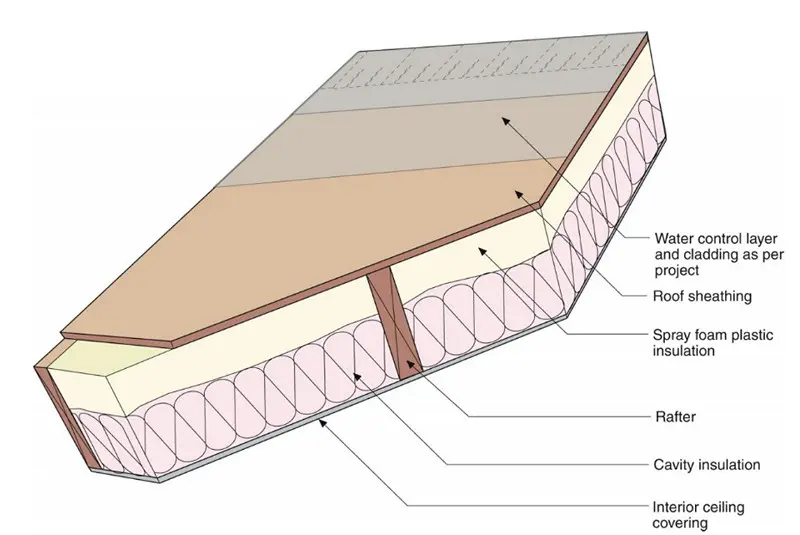
Conditioned attic with insulation below roof sheathing.
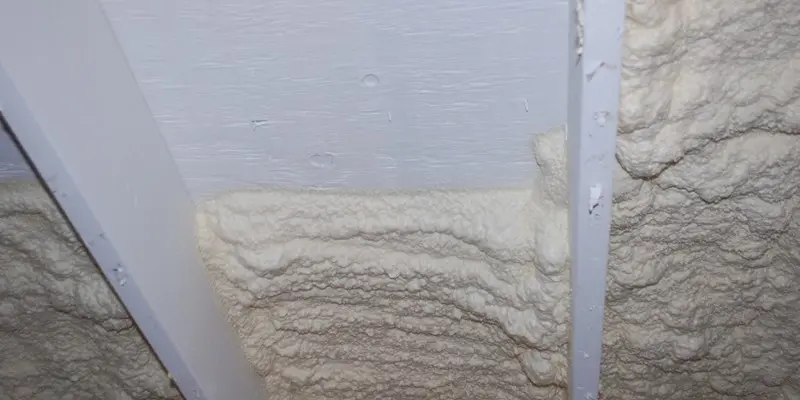
Spray foam on roof sheathing.
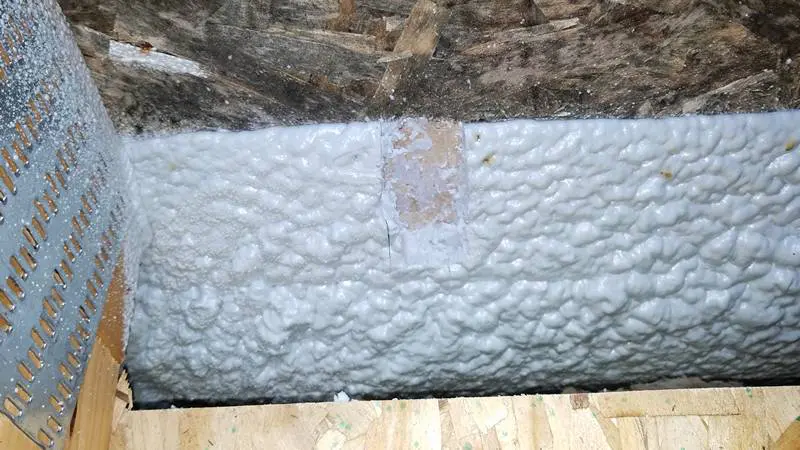
Don’t Mix and Match
A conditioned attic requires a full commitment. Mixing vented and unvented portions will lead to heavy condensation on the exposed roof sheathing. This sheathing is less than a year old.
Further Reading
- Washington State code with diagrams & explanation here.
- Explanation of insulation and dew point issues.
*Heads up – I earn a small commission on sales through Amazon links. This helps cover the expense of running the website (and answering your questions!)