Mold on Attic Insulation - How to Deal With it
Mold growth on the insulation in an attic is much less common than growth on the sheathing or framing. This area is less conducive to mold growth because the insulation is relatively warm compared to the roof sheathing. There are three main reasons we care about insulation in an attic when conducting a mold inspection. First, the insulation is often blocking the soffit venting, which limits the amount of airflow into the attic. Second, in certain circumstances, mold growth can actually occur on the insulation itself.
The last one is weird. If an attic has too much insulation, condensation actually becomes more likely. Why? Because extra insulation means less radiant heat making it into the attic. Duh – this is the whole point of installing insulation. However, there is an unintended consequence. If no heat radiates into the attic, the roof sheathing will remain the same temperature as the outside air (or close). When cold, moist air enters through the attic vents and hits the underside of the roof sheathing, it now hits a very cold surface. Because the sheathing is cold, the moisture condenses on the surface and mold growth occurs.

FAQ’s related to attic insulation issues.
Why does mold growth occur on attic insulation?
Technically, mold does not typically grow on the insulation itself. Fiberglass is not a viable food source for mold. Yet mold growth is often found on the top surface of attic insulation. How does this occur?
- The mold observed on the insulation is not actively growing, but is due to spores falling from the growth on the roof sheathing above.
- The mold is growing on the settled dust on top of the insulation.
What does the mold growth typically look like?
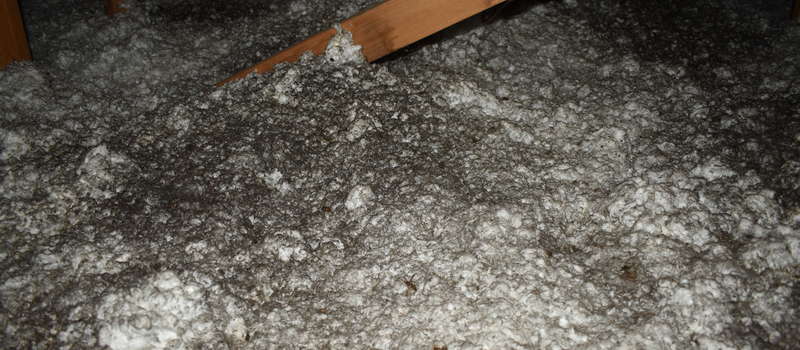
Attic mold often appears as a thin grey or black layer on the very top of the insulation. The dimensionality of the growth is difficult to determine, as the underlying insulation presents a rough and uneven surface. If the mold growth is due to high humidity and condensation, as is usually the case, the mold growth will only occur on top of the insulation. In the image below, notice how the mold growth uniformly covers the insulation, but is not found on the lower layers, which were disturbed during the inspection.
How is mold growth removed from the attic insulation?
First, it is important to remember that mold growth on the insulation does not negatively impact the indoor air quality. Due to the stack effect, the mold spores cannot migrate into the home. There are many unscrupulous contractors who are telling customers to replace all of their insulation, when little or no mold growth is present. This can double the cost of a remediation project and is typically not necessary.
In most cases, mold growth on the insulation is found when mold on the roof sheathing is present as well. In these cases the mildicide treatment applied to the roof sheathing will also treat the mold on the insulation. This will not remove the mold spores or the discoloration. Therefore, in some cases it is best to remove the affected insulation. This can be accomplished by either removing the top several inches of insulation or removing and replacing the full depth. This can add a significant amount to the cost of remediation and therefore, we typically do not recommend it.
What steps are necessary to prevent mold growth from returning to insulation in the attic?
Preventing mold growth on the insulation requires the same steps as outlined in the attic sheathing section. The improvements made to address the condensation on the roof sheathing will address the condensation and mold growth on the insulation as well.
PHOTOS OF MOLD GROWTH ON ATTIC INSULATION
Elevated moisture content found in the insulation.
This is unusual and typically only occurs when an attic suffers from extreme condensation. In this case, while the mold growth was limited to the top of the insulation, the saturation was found several inches into the fiberglass.
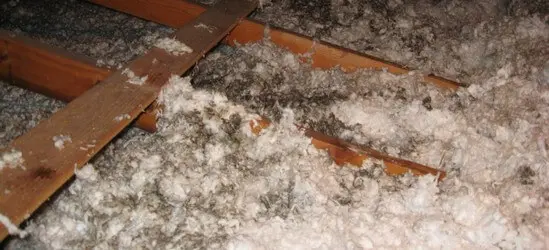
Close up of mold growth on white, fiberglass insulation.
This would be considered light mold growth. Visible without any magnification, but not enough to cause a blackening of the entire top surface.
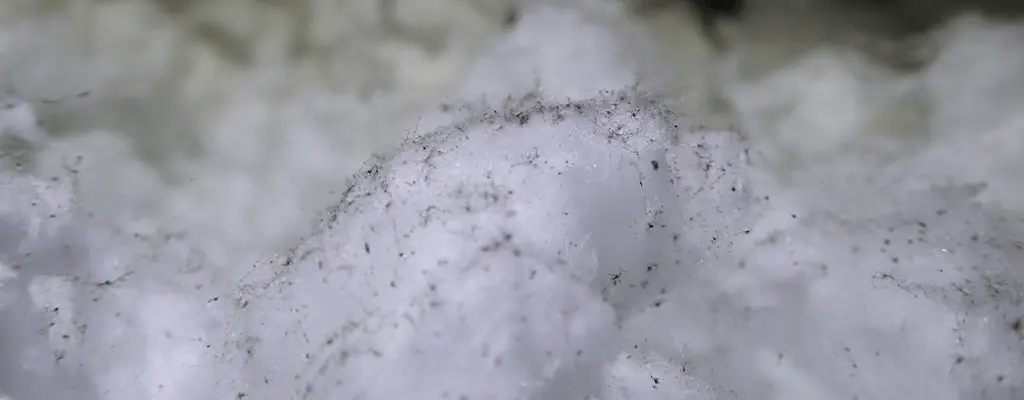
Attic mold on insulation
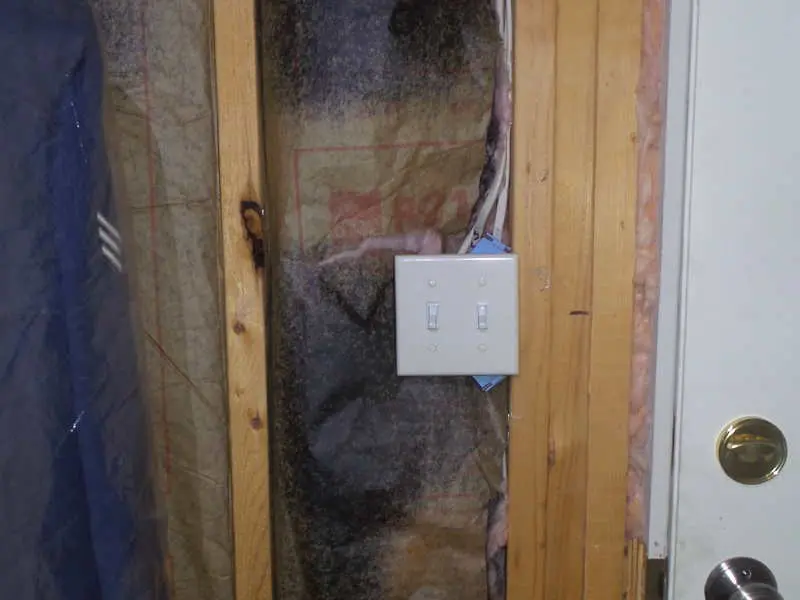
Mold growth occurring beneath insulation.
In this scenario, mold growth was found on the topside of the sheetrock ceiling, but no mold was observed on the insulation. This indicates a site of a prior roof leak rather than condensation.
Visible condensation on fiberglass insulation.
Note the beads of water accumulating on the top layer of the fiberglass insulation. In a short amount of time, this moisture will lead to mold growth. It’s unusual to see the actual beads of water on the insulation. Typically the moisture accumulation is very thin (though sufficient to cause mold growth) and not visible to the naked eye.
FALSE ALARMS
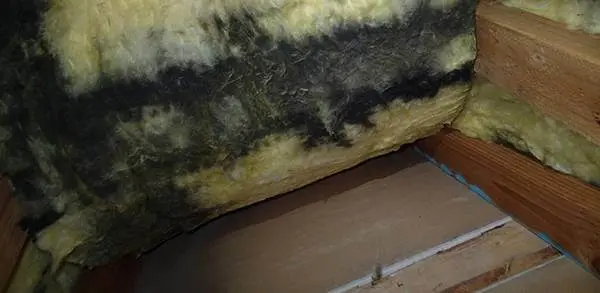
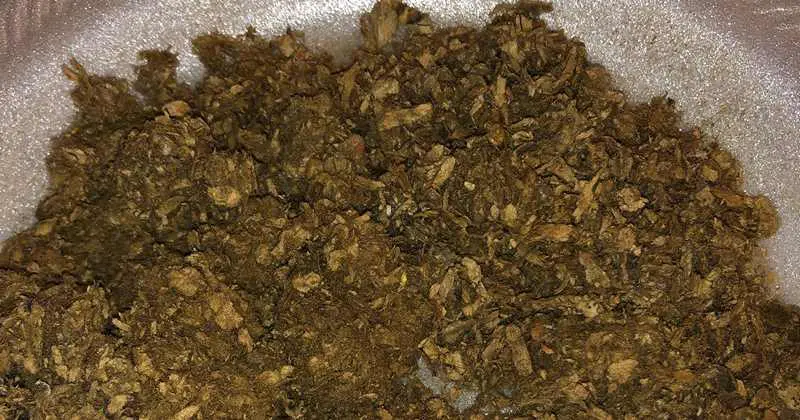
Looks like mold growth? Nope – dust particulates deposited on the insulation.
EXAMPLES OF ATTIC INSULATION INSTALLED INCORRECTLY
Incorrect installation of the insulation is a common cause of attic mold growth. Below are a few examples of common issues.
Insulation installed upside down.
Note the plastic backing on the top side of the insulation batts. The kraft paper or plastic should always be facing the warm side of the ceiling or wall. In an attic, this means the paper or plastic backing should touch the ceiling. Note in this image, the plastic backing is facing upward.
Insulation incorrectly installed directly to roof sheathing
Conditioned attics are great if they are built correctly. This requires installed closed cell foam directly against the roof sheathing. In this project, the contractor had simply used standard fiberglass batts on the roof sheathing. Because these are not vapor impermeable, moisture can easily migrate through the insulation and cause mold and rot on the roof sheathing.
Insulation installed too close to sheathing, leading to mold growth.
This is the most common problem related to attic insulation. Careless insulation contractors often install the insulation too close to the sheathing near the soffit vents. This cuts off the air flow from the outside and leads to condensation and mold growth.
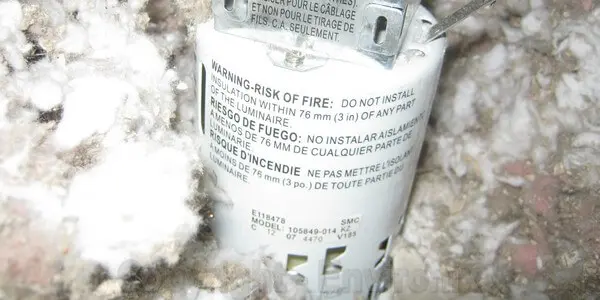
Insulation installed too close to electrical components
While not a mold issue, this can certainly create a fire hazard. Notice the warning on the light, indicating the insulation should remain at least 3″ from the insulation.
Project Report > Inspection Regarding Mold & Moisture on Insulation
Work # 101023
Weather
- Overcast and cold
General
- Temperature:
- Outside: 34 degrees F
- Warehouse: 69 degrees F

Saturated Insulation
- Relative Humidity (RH):
- Outside: 29%
- Warehouse: 34%
- Dew Point: 35% @ 40 deg F.
- In most cases, mold growth can occur when the relative humidity levels range 65% to 99% in a given environment. However, when cold outdoor temperatures exist, conditions can form where even low amounts of humidity can condense on poorly insulated surfaces. This “dew point” is where water vapor becomes liquid and provides the conditions needed for mold growth to begin.

Mold in Insulation
- Carbon Monoxide (CO):
- Outside: 0 ppm
- Warehouse: 0 ppm
- Ideally, CO concentrations indoors are expected to be the same as CO concentrations outdoors. CO concentrations are typically around one to two parts per million parts of air (ppm) or less. Concentrations are usually lower in rural areas. Finding CO concentration higher indoors than outdoors indicates an indoor source of CO, or a source very close to your home.
- Carbon Dioxide (CO2):
- Outside: 387 ppm
- Warehouse: 779 ppm
- The American Society of Heating, Refrigerating and Air-Conditioning Engineers (ASHRAE) recommends a concentration of CO2 no more than 700 ppm above the ambient air (outside) concentration in order to minimize human odors and maintain comfort.
Observations:
- Water and mold damage along north wall was inspected.
- Approximately 1/4 of roof insulation had been previously pulled prior to inspection.
- Largest visible area of mold growth and damage was in the NE corner nearest to skylight.
- Area of roof decking with mold damage contained excessive moisture levels of 80% and above.
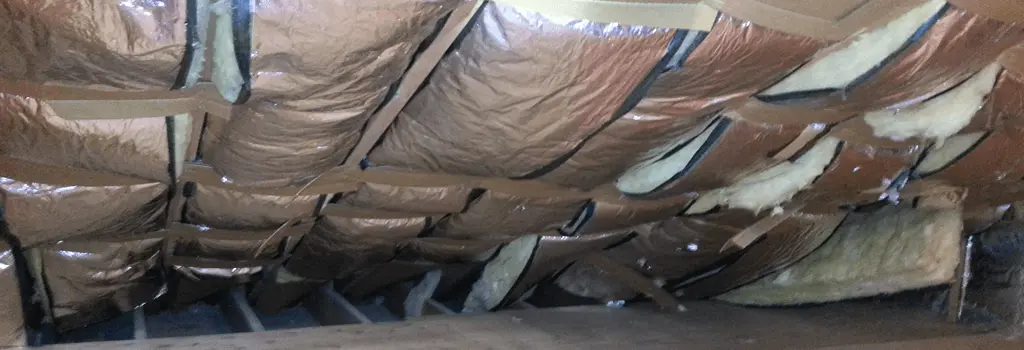
- FSK facing was pulled away to inspect underlying insulation and roof decking.
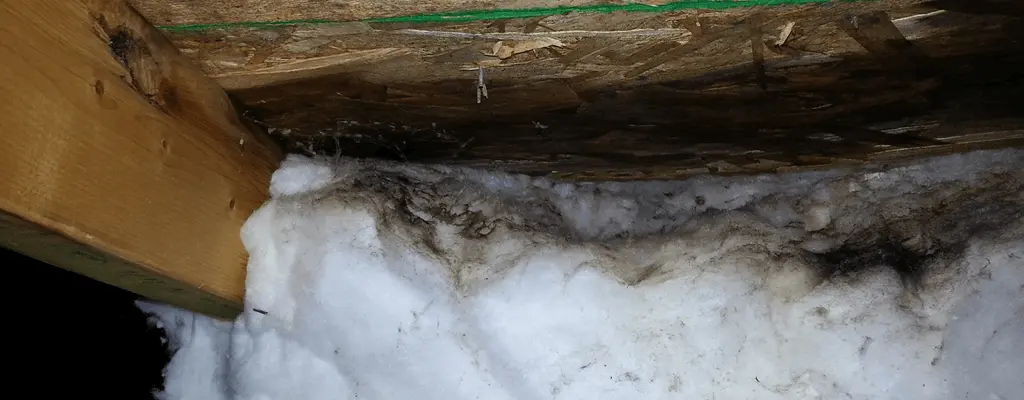
- Insulation behind FSK facing was wet to the touch and was stuck to the roof decking due to moisture.
- Several locations were noted where visible mold growth was found under the insulation.
- A strong, musty odor was present each time the FSK facing was pulled away to expose the underlying insulation.
- Each area where roof decking was inspected, visible mold growth was found in isolated patches as well as active condensation being present on OSB roof decking.
- Environix conducted random inspections of insulation and roof decking throughout the warehouse.
- Each inspection of the roof decking revealed moderate to heavy condensation and moisture content levels between 40% and 99%.
- Visible mold growth was also noted in the majority of random roof decking inspections, though it should be noted that visible mold growth was not found in every location. (See attached photos in section above)
- Spotty mold growth appears consistently in all locations inspected.
RECOMMENDATIONS
- Recommend all FSK facing and insulation be removed from ceiling cavity throughout warehouse.
- Recommend roof decking be below 25% moisture content before remediation is conducted.
- Recommend treating roof decking with a two-stage, chemical treatment to kill and encapsulate all mold growth.
- Recommend consulting a commercial insulation contractor to design an insulation system that is specific to the needs of your company
*Heads up – I earn a small commission on sales through Amazon links. This helps cover the expense of running the website (and answering your questions!)
Got a question? Ask it here and we'll post the answer below
This is the insulation that came from my ceiling during repair from over a year long span of water leaking through a skylight and exhaust fan. Should I have the space inspected for mold. If this isn’t how it is supposed to look who do I call because my landlord said it was normal and ceiled the hole in the ceiling and sprayed texture paint over it! Who do I call that help me get the proper repairs for my home?
Due to the color of your insulation, it’s difficult to determine if mold growth has occurred. When mold grows on white or yellow insulation it is a much more obvious. The good news is that mold growth in the ceiling won’t impact the indoor air quality (Assuming the hole is fixed). Any remaining mold spores from the initial leak will go dormant once the materials dries out. If you would like to test for mold, I recommend a non-viable airborne mold test. This would determine if your home suffers from elevated mold spores. This can be done via a local mold inspector or from a mail order kit such as this. You could test the insulation itself for mold. But this won’t answer your primary question – whether it’s potentially impacting the indoor air quality.
How long does mold treatment last on insulation?
Preventative treatments of mold have a limited lifespan. They are essentially rendered useless once a layer of dust settles on top of the treatment. The mold will simply grow on the dust. This is especially true for horizontal attic insulation, which encounters are large amount of settled dust. This timeline varies wildly, but in general you’re looking at a month or so at least.
Due to the ineffectiveness outline above, we do not recommend treating insulation. It’s best to either leave it be or replace it. If it’s blown in insulation, it is sometimes possible to vacuum off the top layer, while leaving the bulk of the insulation behind.
Since my old insulation has been removed should the fogger be used before putting in new insulation?
It depends on the quantity of mold and how the insulation was removed. If the insulation was removed via a vacuum (and they did a thorough job), you likely don’t need additional fogging. If there was heavy mold growth throughout the attic and a vacuum was not used, the fogging is a good idea.
We have considerable mould in the attic that has dropped onto the insulation. Mold removal was first considered, but then we wondered if the insulation also needs removing. IF we were to replace the insulation, what order of work makes sense to you.ie. removing the insulation, then the mould, then the insulation??? Thanks so much. Sorry no pic available. Read the info about not necessarily needing insulation removal, but. . . worried about that mold.
Much of this depends on the severity of the mold growth and your comfort level. It certainly won’t harm anything to remove the insulation. Note – if it’s blown-in insulation you can often remove just the top layer.
Removing the insulation first is generally preferable. It allows the remediation crew to operate much faster and perform a more thorough application. Make sure you air seal the ceiling after the insulation is removed. This is a very effective way to minimize future mold growth. See info on air sealing on the attic mold prevention page.
I have recently found black stains on the kraft paper. I'm just wondering if this is mold growth.
This is typically not mold growth. The kraft paper is constructed with a tar paper backing. Occasionally this bleeds through the brown paper covering, leaving a black, speckled appearance.
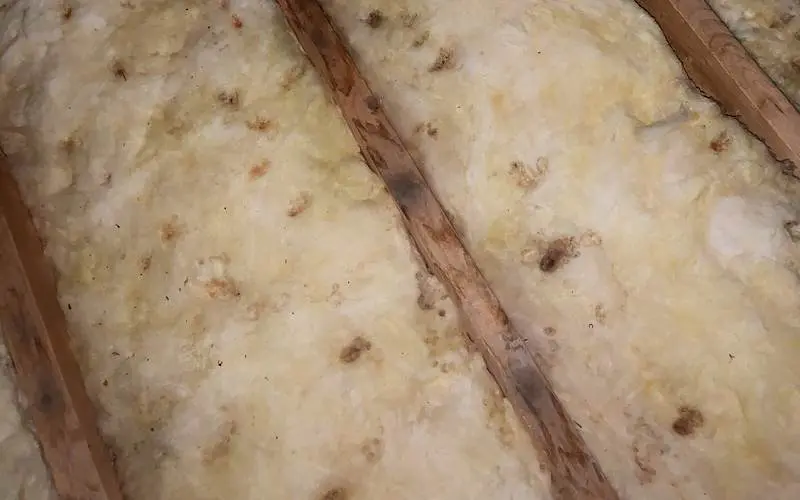
Our home inspector says he found mold in the attic near a vent. I’m really not sure where he’s talking about, as none of the areas around the venting are discolored or growth or out of the normal. The only thing I see odd is these spots on the insulation. The roof and rafters above have no discoloration other than some sap. Is this the mold he is talking about?
The spots on the insulation are the result of condensation on the underside of the roof sheathing. When the condensation is severe, the water will drip onto the insulation below, causing those stains/divots you see in the photo. This level of condensation is typically accompanied by significant mold growth on the sheathing. However, there are times when plywood happens to be particularly resistant to mold growth, as seems to be the case here.
Either way, I highly recommend increasing your roof ventilation (soffit and ridge area). Recheck the attic during a cold/winter period and look for dripping. If the dripping continues, add more ventilation and/or increase the ventilation inside the home via a constant flow bathroom exhaust fan.

